
Loser pays, Winner stays
During weekends when I was a kid, I used to grab a bag of quarters, hop on the subway, and head to Times Square for the day. In those days, arcades weren’t like Dave and Busters filled with families. This was the seedy Koch/Dinkins era of Time-Square. It was awesome.
If I was having a good day, I could spend a few hours on Galaga or Pac-Man until my quarters ran out. I always spent my last dollar on Dragon’s Lair; I was such a sucker for those animated laser-disc graphics, but I never once made it past the first cut scene.
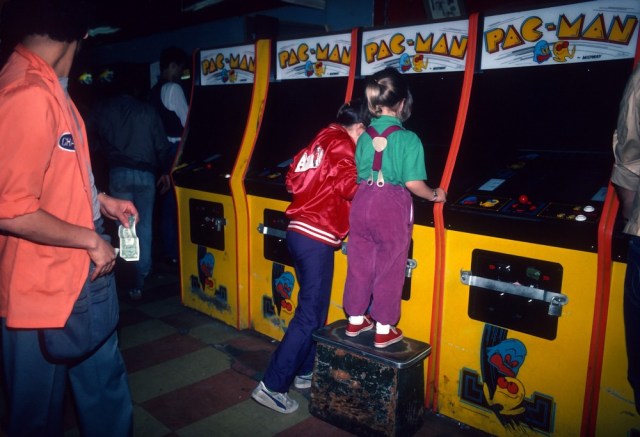
From timeline.com
After I got a Nintendo (NES) for Christmas, my energy went into marathon sessions of Mario Bros. and Double Dragon in the comfort of our cold basement.
Maybe it’s natural then that I associate those old video games with struggle, danger, and even little a whiff of the forbidden. Over the past few weeks, I’ve been deciphering MAME versions, hacking at roms, and downloading files from legally-questionable sites, but when that Double Dragon theme starting playing I was all smiles.
Getting Started
First off you need the minimum hardware; Raspberry Pi 3 Model B, power adapter, MicroSD (at least 32GB), HDMI cable, and a controller. I didn’t like most of the RetroPie kits that I saw because most were made up of cheap components (microSD, power, controllers etc.). So, I sourced everything individually.

You’re going to be writing and reading a lot from the MicroSD so don’t skimp. The Samsung 32GB MicroSD was recommended by a few forums. I may even go back and get a 64GB. Atari games are only a few kilobytes but Playstation ISO’s really add up.
Controllers
A lot of people recommended the Buffalo Classic USB Gamepad as a low cost, yet quality retro controller. I didn’t get one for two reasons; I heard they take weeks to ship and I also wanted a all-around generalist controller more suited to all the platforms the Retropie can emulate. So, I bought the Logitech F310 for only a few dollars more.


The Logitech was a great choice. Once I got through the initial configuration upon first booting the Retropie, I didn’t have to do anything else to get it to work on all the games/platforms. Though according to the RetroPie wiki, the RetroPad ABXY pattern is the opposite of the ABXY pattern on the controller (A=B). When I set mine up, I followed A=A, so maybe I’ll go back and fix that. Really it doesn’t matter because I just hit buttons till I figure out what does what in each game anyway. That lack of instruction feels more like retro gaming in my opinion.
EDIT: I liked the Logitech so much I ended up also getting its wireless brother the F710. Which was just as easy to setup.

Overclocking
You’ll definitely want to overclock the CPU to run any N64 and Playstation games. Even some of the newer FBA/MAME arcade games probably benefit. Once you overclock, you have to address cooling. I bought heatsinks and a stuck them on the processors. I also got a fan-cooled case.


Power is Important
Get a good power adapter for your PI. Ideally it should output 5+ volts and 2+ amps. Initially, I was running the PI off a 5V 600mA phone charger that I had laying around. The Pi turned on and everything seemingly worked, but only later did I realize that the Lightning Bolt icon I kept seeing flash in the corner wasn’t normal. My pi wasn’t getting enough juice. This is especially critical if you overclock your Pi.

Don’t get a cable that has a switch in it. The worse way to shut down the PI is by cutting the power. That’s a sure way to corrupt the SD card. Use the shutdown command from the UI or terminal instead. (I’m actually researching a way to add a button to the case and scripting a shutdown command.)
Loading RetroPie
This part is straight forward. Follow the instructions on Retropie’s site for your OS. Essentially you download and unzip Retropie, and use an app (like Pi Baker for Macs) to load the image file onto the SD card.
Then all you do is put the MicroSD into the Pi, connect the HDMI cable, controller, and power and you’re done. Once it boots up, you’ll be prompted with to configure your controller. Press the buttons it asks for and you’re done. For now.
Getting Games to Work
In 1988, my dad brought home a new IBM PS2 and immediately my brother and I went to work setting it up. Finally, we pushed the power button and the screen lit up with a cursor that blinked. And blinked. And blinked. It slowly dawned on us that the computer wasn’t going to do anything. It sat there just prompting us, beckoning us, practically daring us to take the next step. The RetroPie reminded me of that.
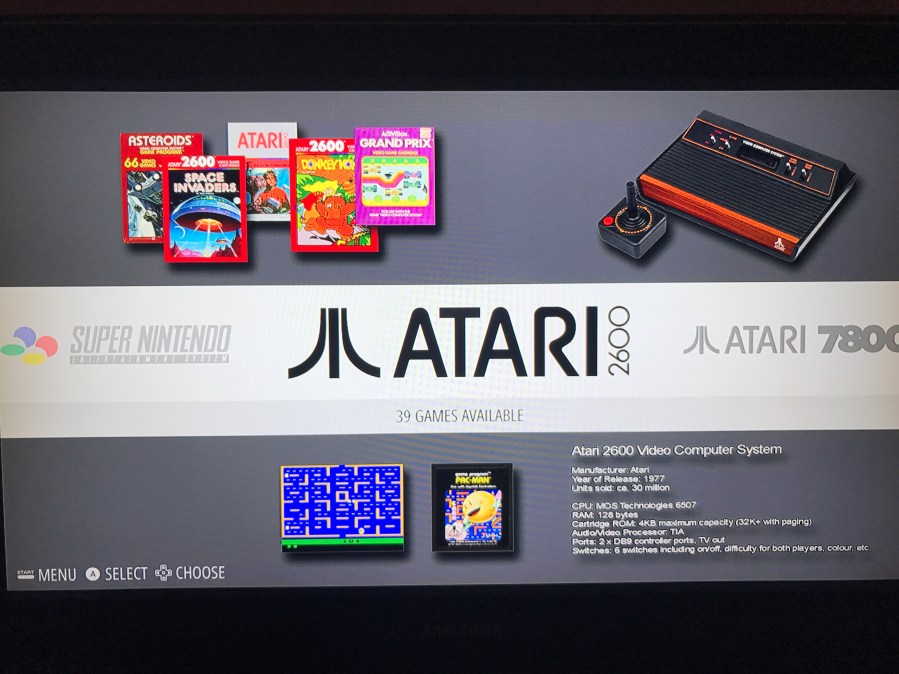
The RetroPie doesn’t come loaded with any games. Nothing. Even the first screen that shows ’13 games’ under the Retropie logo is misleading. It means 13 options are available.
There are a few ways to transfer ROMs (games) to your Pi; USB, FTP, or SMB. Personally I find the USB option awkward and complicated. Also, I didn’t have a thumb drive large enough. I didn’t feel like installing an SFTP app, so I just used SMB shares.
Setting up WIFI on the Retropie allows for hands free (although slower) transfers. The only caveat is that you will need a usb keyboard to enter the password. If you have an Ethernet cable and can connect the Pi directly to your router/hub, this is a bit faster and doesn’t require a keboard. From my Mac, I opened Finder, selected Go >> Connect to Server.. and entered smb://retropie as the server address. Login as Guest. Select roms as the directory and now you can drag and drop files as you would with any other folder.
Legally, you should only have roms for games you own. Google roms related to the platform you want (ex Atari 2600) for examples. Some search results might mention ‘bundles’ or ‘reference sets’ and will save you downloading individual examples. Some examples may list the origin county in the filename – [U] United States, [E] Europe, [J] Japan – or some combination of such. Examples that have [!] are usually the best working option.
Use the RetroPie supported systems wiki as a guide. It will tell you what directory to put roms in and what file types are expected by that platform. For example, Sega Genesis roms go in /roms/megadrive and will have an extension of smd, bin, md, iso, or zip. Copy the file to the proper directory, reboot the Pi (from the UI quit menu), and then try loading the game. It’s that easy. Sometimes.
Troubleshooting games
I spent a lot of time in the Reddit RetroPie sub and other sites trying to figure out how to get MAME and FBA games working. There are lots of posts and videos on this topic. Despite that, it’s surprisingly tricky to figure out. It’s even a bit hit or miss when you do.
First follow these preparations for the specific platforms. Then we’ll cover troubleshooting individual games.
FBA, Arcade, and NeoGeo
Save yourself a ton of frustration and go find a file called NeoGeo.zip. Ideally, it should contain;
- 000-lo.lo
- asia-s3.rom
- japan-j3.bin
- sfix.sfix
- sm1.sm1
- sp-1v1_3db8c.bin
- sp-45.sp1
- sp-e.sp1
- sp-j2.sp1
- sp-s.sp1
- sp-s2.sp1
- sp-u2.sp1
- sp1.jipan.1024
- uni-bios_1_0.rom
- uni-bios_1_1.rom
- uni-bios_1_2.rom
- uni-bios_1_2o.rom
- uni-bios_1_3.rom
- uni-bios_2_0.rom
- uni-bios_2_1.rom
- uni-bios_2_2.rom
- uni-bios_2_3.rom
- uni-bios_2_3o.rom
- uni-bios_3_0.rom
- uni-bios_3_1.rom
- vs-bios.rom
- uni-bios_3_2.rom
Copy that zip into each of the three corresponding roms folders. Then go toRetropie > Retropie Setup optional packages and install the FBA2012 emulator.
MAME
Go back to Retropie > Retropie Setup and install the optional package mame2010.
Playstation (PSX)
You need to google and download the bios files for the Playstation – SCPH1001.bin (USA), SCPH1000.bin (Japan), and SCPH7003.bin (Europe) – and drop these in the directory /RetroPie/bios/.
General Troubleshooting
File Type – Assuming you’ve dropped the correct Rom file in the correct directory, your game should just load when you start it from the UI. If it doesn’t load or you get glitches during gameplay, the first thing to check is the file type. Some platforms like the Atari7800 will take .zip files. Others need you to unzip the file contents. Check the RetroPie wiki for the expected file type. That will let you know if you need to unpackage the downloaded file before you transfer it over to the rasperry pi.
Try different Emulators – Next, you can try a different emulator for that specific game. If a game doesn’t load and goes back to the selection ui, you have other options. As it loads, you’ll see a message to hit any button for options. Do that, and you’ll see the following menu.
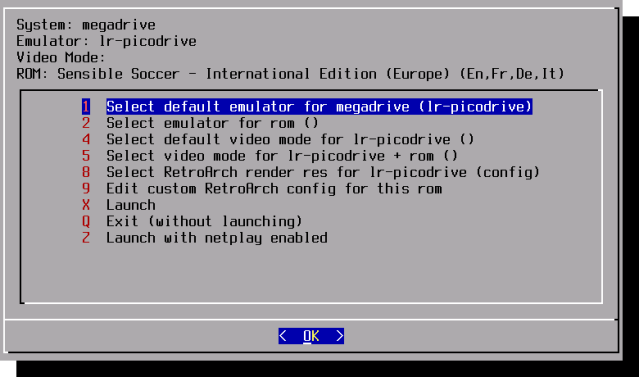
In this example, the default emulator for Sega Genesis roms put in the /roms/megadrive/ directory will use the lr-picodrive emulator. If for some reason, that emulator didn’t work you could select option 2 and try setting lr-genesis-plus-gx or DGen for that specific game to see if they work better.
This works really well for troubleshooting MAME, Final Burn Alpha (FBAlpha), and N64 games. The retropie wiki provides a chart of which MAME versions work with what emulators, but it’s really hard to know what version of a rom you might have. Rotating through the possible emulators is a trial and error method that should work. Note that your emulator choices are limited by the directory you place the rom in. The Arcade folder allows you to select all of the MAME and FBalpha related emulators, whereas the MAME and FBAlpha directories only offer those emulators specific to that directory.
For other troubleshooting, try the Retropie offical FAQ and Reddit Retropie FAQ.
It’s on like Donkey Kong
I hope you enjoy recapturing your youth as much as I have.
